Measurement of hardened layer thickness of steel bar quenching
After quenching the workpiece, the hardened surface layer of the organization is denser than the internal, high-frequency ultrasound through the surface coupling agent into the surface of the workpiece grain smaller martensitic organization, its energy attenuation is small; when the ultrasonic wave encounters a relatively coarse grain ferrite and pearlite, due to the difference in acoustic impedance, ultrasonic waves will be formed by the reflection of the return wave. By calculating the propagation speed and propagation time of ultrasound in this material, the distance of the echo can be obtained, and the thickness of the hardened layer can be calculated. Determination of the depth of the hardened layer on the thin surface of the steel bar parts of the detection methods is mainly microstructure measurement method, microhardness measurement method, etc… In this case, the conventional ultrasonic technology will be used, using a 20MHz high-frequency single-crystal probe for ultrasonic testing, convenient and quick.

The workpiece to be inspected
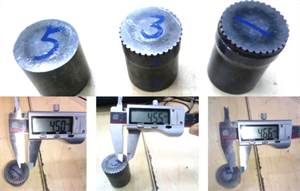
The workpiece to be inspected is three steel rods, the surface of the rods is a martensitic organization, and the parent material is mainly a relatively large grain ferrite and pearlite organization, as shown in Figure 1 below. the digital vernier calipers roughly measure the quenching layer of the three end faces, and the values are 4.5mm, 4.55mm, and 4.66mm respectively.
Inspection results
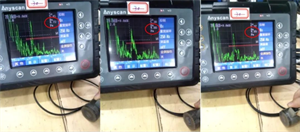
This testing program cleverly uses the end face echo for quenching layer thickness measurement, using a 20M high-frequency probe, and transverse wave oblique incidence detection. From the equipment side, the first higher clutter buried depth of 4.72mm can be read when detecting the No.1 end face; the first higher clutter buried depth of 4.66mm on the No.2 end face; and the first higher clutter buried depth of 4.65mm on the No.3 end face.

Conclusion
From the test results, it can be known that the highest wave of stray waves can be clearly seen by using a high-frequency transverse wave oblique probe. Therefore, it is feasible to use a high-frequency single-crystal probe to detect and calculate the thickness of a quench-hardening layer of certain metal steel parts.


